Many people who have a brief introduction of fiber patch panel, the device conducive to cable management may be from the Google or my blog, well, but when we really want to use the fiber optic patch panel, what preparations of the patch panel we should do, this article will give you the answer. As for some people say that my blog has too few pictures, and I try to show more.
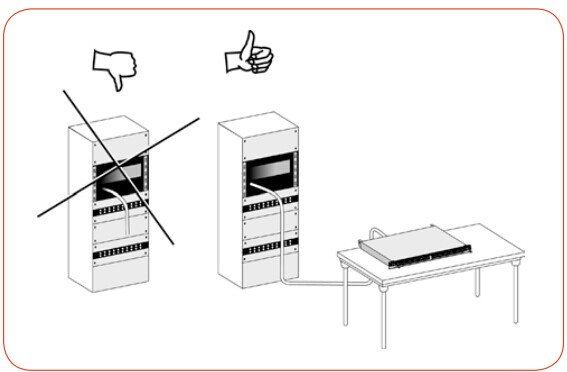
First, ensure a length of spare cable (slack) is provided within the cabinet (5m recommend). As well as being required to facilitate the termination of the cable will allow for the possibility of Pre-terminated patch Panel, repair and ability to relocate the panel if required in the future.
The spare cable may require special stowage requirements in the installation. Before termination, always cut off the first meter of cable as this part can be damaged after pulling the cable, bending etc…The removal of this 1m section to the final amount of cable slack provided.
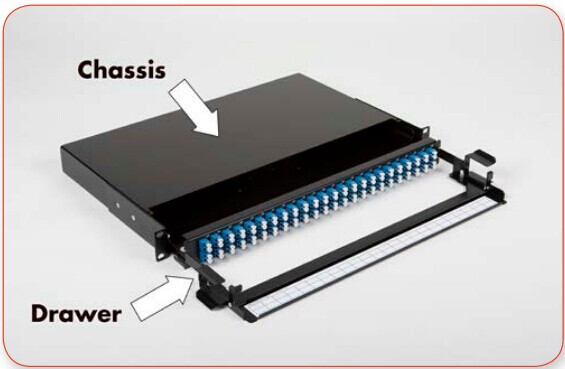
- Slide the sliding drawer off the chassis (fixed part) – lift the drawer up to disassembled it from the chassis.

- Keep the drawer in an upwards position and pull it forwards.
- When reaching the end of the chassis, lift the drawer more and unhook, now both parts are separated.

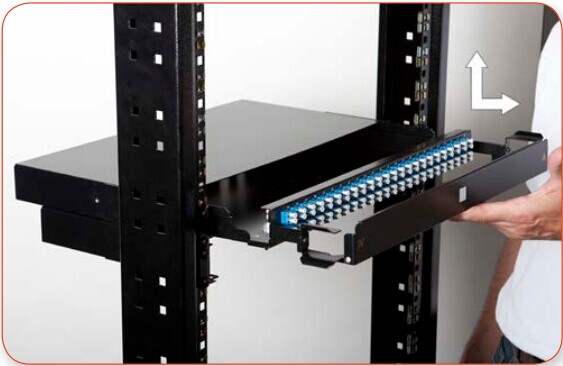
The L-shape brackets of the chassis can be installed forward or recessed. By default, it is installed in the forward position. Change it to the right position is dependant on the available space between the 19″ frame and tge cabinet door.
Then, position the chassis into the rack.
Remember to complete earthing requirements for metallic items using the screw and star washer provide a suitable earthing cable.
The hole for the screw is located at the rear of the panel on the left-hand side of the chassis
Thread the cable through the chassis of the Black Box Patch Panel. Make sure to respect the minimum bending radius while handling the cable.
Tips:
1. Sliding drawer preparation
For direct termination or pre-term installation: install the 4 support bases using the 4 small screws, washes from the screw kit provided and insert 4 loop rings on every support base, with the loop ring opening facing inwards. They will be used later to support the fibers.
2. For splicing
Install the first splice cassette on the drawer using the 2 longer screws and associated locking washers from the screw kit. The additional cassettes will be installed at a later stage. To connect the additional splice cassettes the hinges at the back of the splice cassettes will be used. Up to 4 splice cassettes can be installed according to the number of fibers to be terminated.